
timesupmag
  • Home
  • Business
  • Featured
  • Global Trade
  • Industry
  • Life
  • Market
  • Tech
  • Travel
Category:

Market

Market

How Vertical Mast Lifts Quietly Improve Indoor Maintenance and Elevated Access

by Margaret August 7, 2026

Facing the usual problems: height, space, and time

The trouble shows up slowly: narrow aisles, lacquered floors you can’t scratch, short maintenance windows between shifts, and crews nervous about scaffolds and ladders. I’ve watched teams choose a rotating telehandler for the wrong reasons — because it was available, not because it fit the task — and the job still felt clumsy. A vertical mast lift changes that dynamic by matching reach to context and keeping movement deliberate and minimal.

What a vertical mast lift fixes, practically

Think of the lift as a focused tool that directly addresses core constraints:- Reduced footprint: fits where scissor lifts and booms can’t, so you avoid time-consuming set-up and floor protection work.- Controlled vertical access: operators get steady, precise platform movement, which lowers the risk of dropped tools and rework.- Lower noise and emissions: many are electric, which matters during night maintenance or in climate-controlled interiors.- Faster turnover: simple drive-to-position workflows shorten the time from arrival to task start.Each point reduces interruptions and helps teams keep a calm pace instead of racing around hazards.

Operator and site pitfalls to avoid

Even a well-chosen mast lift fails when fundamentals are ignored. Common traps:- Skipping a brief between operator and facility manager; misaligned expectations cause delays.- Forgetting floor-load checks in older buildings; compact footprint doesn’t always mean light footprint.- Overlooking battery-charging logistics; an idle battery mid-shift can stall an entire schedule.- Treating the lift like a ladder; safe use demands trained operators and a rescue plan.Address these and the lift becomes an instrument of steady progress, not a new source of stops and starts.

One practical example from the field

During a contracted winter maintenance period at a major European airport, technicians favored the Zoomlion ZTH4525R for narrow concourse work because it allowed quick positioning, quiet operation between flights, and minimal surface protection. That real-world choice came from crews who needed predictable performance under time pressure — the exact kind of constraint a vertical mast lift was made to solve.

When to choose a mast lift and when to consider alternatives

There’s no single right tool. Use a vertical mast lift when tasks require brief, repeated access in confined indoor spaces and when minimizing setup time matters. Consider alternatives when:- You need outreach beyond the mast’s vertical line.- Work involves heavy loads or extended platform travel.Alternatives include compact booms for outreach, scissor lifts for larger platform requirements, and scaffold for long-duration access where movement is minimal. Match the machine to the task rather than the other way around.

Bringing it together, calmly and clearly

Decide by asking simple, precise questions: where must the platform go, how long will teams stay aloft, and what surface protections are required. A vertical mast lift turns those answers into fewer interruptions, steadier work, and safer routines. For teams wanting a reliable, compact solution that fits indoor rhythms, Zoomlion Access provides options that respect the quiet, focused needs of maintenance windows and elevated access tasks.
August 7, 2026 0 comments
0 FacebookTwitterPinterestEmail
Market

A Practical 24-Point Framework for Folding Robust Hinge Pins into Existing Conveyor Lines

by Charles August 4, 2026

Introduction: why a framework matters

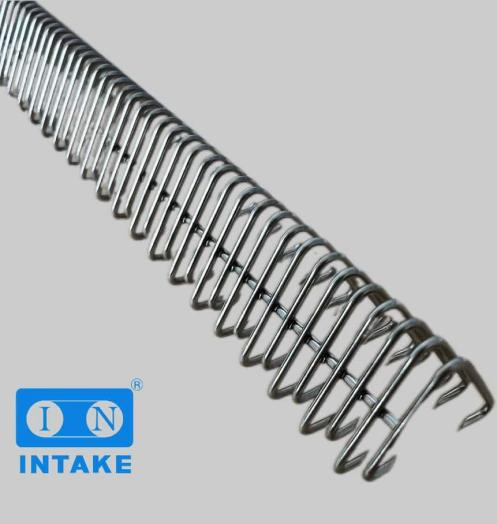
The modern shop floor needs decisions that map directly to machines and people, not vague strategy memos. This framework lays out a repeatable path to slot in a critical part — the conveyor hinge — without tearing up your current setup. Start with a clear part spec and go straight to a test fit; that’s where you’ll likely call up a replacement like a conveyor belt hinge pin and discover whether the bushing, tolerance, and pin retention meet your line’s rhythm. The Highland Park Model T line showed a century ago that small, reliable parts multiplied throughput dramatically; we build on that same practical insight.

conveyor belt hinge pin

Framework overview: the 24 checkpoints

Think of this as four clusters of six checkpoints: Define, Validate, Integrate, and Measure. Each cluster contains concrete actions: measure shaft diameter, check shear strength requirements, verify corrosion resistance, run a dry fit, simulate load cycles, and document failure modes. The process keeps you from swapping components like guesswork and forces objective acceptance criteria at each handoff.

Define: get exact about fit and function

Record metrics that matter: shaft diameter, bushing inner diameter, lateral play, expected cycles per hour, and environmental exposure. Note the manufacturing tolerance window you can live with — half a millimeter can be the difference between smooth rotation and catastrophic edge wear. Embed {main_keyword} into your drawings and add {variation_keyword} into part descriptions so procurement and engineering speak the same language.

Validate: testing that avoids surprises

Run three quick tests: a static fit, a dynamic cycle under nominal load, and a contamination run if dust or moisture is present. Use a sacrificial test segment before committing to full-line rollout. Pay attention to lubrication points; correct grease type can extend hinge pin life by weeks under heavy duty. — If a pin scuffs in the first 1,000 cycles, you’ve saved a week of downtime by catching it early.

Integrate: mechanical and human steps

Integration is half mechanical adjustments and half operator training. Mechanically, ensure pin retention systems, clip engagement, and any spring-loaded features seat cleanly. Train line techs on quick inspection cues: feel for play, watch for uneven rotation, and mark pins that heat up after 15 minutes of operation. When sourcing, work with a reputable hinge pin manufacturer — they’ll offer material traceability and fast replacements when lead times tighten.

Operational teardown: what to record

Document the teardown in plain language: where the pin rides, what the mating surface looks like, any visible wear patterns on the bushing, and the torque required to remove the pin. Capture industry terms precisely — hinge pin, bushing, pivot pin — so repair logs stay useful across shifts. This operational teardown becomes the single source of truth when you compare alternative designs or consult external suppliers.

conveyor belt hinge pin

Common mistakes and how to avoid them

Teams often pick pins by price or assumed compatibility. Avoid that trap: mismatched hardness leads to rapid wear; ignoring shear strength spec risks sudden failure under shock loads. Don’t skip a staged rollout. A full-line swap without a week-long validation run is inviting a hidden failure. Look for signs early and log them; those small notes save large repair windows later.

Sourcing and vendor selection

Choose suppliers that provide clear test data and on-site support. Verify that cataloged parts match your documented tolerance and environmental needs. A quality partner will supply sample batches and clear metrics like fatigue limit and material grade. For tight timelines, maintain one reliable backup vendor; a known hinge pin manufacturer that can ship overnight trims risk and preserves uptime.

Three golden rules for evaluation

1) Fit first: Confirm dimensional tolerance and bushing clearance under load. 2) Test second: Always run a minimum of 10,000 cycles in a representative environment before full deployment. 3) Sustain third: Track in-field wear rates weekly for the first month and compare to expected lifespan data.

Conclusion

Implementing this 24-point framework gives teams a repeatable path from specification to stable operation; measurable checkpoints cut guesswork and reduce line interruptions. Trust the process, measure the right things, and your maintenance team will thank you. Intake. —

August 4, 2026 0 comments
0 FacebookTwitterPinterestEmail
Market

Estimating Lifecycle Maintenance Costs for a Premium Commercial Outdoor Water Slide

by Lisa July 26, 2026

Quick snapshot: what we mean by lifecycle cost

Think of lifecycle maintenance cost as everything you’ll spend after installation to keep a premium commercial outdoor water slide safe, fast, and open. That includes routine service, spare parts, structural upkeep, water treatment, and big-ticket refurbishments. If you’re sizing up a water coaster ride, this is the line item you can’t ignore.

water coaster ride

Core cost components

Break it into clear buckets: preventive maintenance (pump runtime monitoring, filter swaps), consumables (chemicals, seals), repairs (gelcoat scratches, structural steel corrosion protection), and periodic overhauls (relining, replacement sections, mechanical upgrades). Labor and downtime matter too — a week-long shutdown is a revenue hit as much as a repair bill.

Ballpark numbers and a real-world anchor

Industry practice often treats annual upkeep at roughly 3–7% of initial capex for well-maintained, premium rides, with larger mid-life refurbishments at years 8–15 that can push total lifecycle spend to 30–50% of the original purchase price over 20–25 years. IAAPA and major U.S. park operators routinely plan on multi-year maintenance cycles; Orlando water parks, for example, budget for both frequent small fixes and scheduled major work before peak seasons. Those benchmarks help when you’re comparing vendors or building a business model.

Comparative scenarios: low vs. high maintenance realities

Scenario A: Higher upfront quality (superior gelcoat, UV inhibitors, thicker structural members) costs more initially but reduces emergency repairs and extends service intervals. Scenario B: Lower capex up front saves money today but increases corrosion, pump failures, and premature resurfacing. Over 20 years, the higher-quality build often costs less per operating hour — especially in salty or high-UV climates.

What operators actually get wrong — and how to avoid it

Operators underbudget two things: pump runtime monitoring and water chemistry control. Both cause domino failures — failed bearings, metal fatigue, biofilm in lines. Don’t skip scheduled diagnostics. Also, many choose cheap coatings, assuming they’ll swap them in five years — but downtime and labor can double the apparent savings. — Small thought: maintenance planning is more about discipline than cash.

Practical checklist for estimating your numbers

Use this when you build your pro forma:- Annual routine: track labor, parts, chemicals as a percent of capex (start with 4–6%).- Predict two mid-life refurb events over 20 years (budget 10–20% of capex each).- Add a contingency for unexpected structural fixes (5–10%).Also factor in pump runtime hours, seasonal load spikes, and local corrosion risks — those drive real costs.

Talking to vendors and what to ask

When you consult a water ride manufacturer, ask for lifecycle service plans, typical downtime statistics, and failure modes they see in similar climates. Request documented mean time between failures (MTBF) for pumps and valves, plus explicit warranty terms for gelcoat adhesion and structural components. Get recommended inspection intervals in writing — those become your maintenance playbook.

Golden rules — three metrics to pick the right strategy

1) Total Cost of Ownership (TCO) over 20 years: include capex, projected maintenance, and downtime losses. 2) Mean Time to Repair (MTTR) and Mean Time Between Failures (MTBF): shorter MTTR reduces downtime costs. 3) Refurbishment frequency vs. coating life: choose materials that double maintenance intervals, even if upfront price is higher.

water coaster ride

Closing thought

Estimate conservatively, plan for mid-life refurb, and prioritize proven materials and diagnostics — that approach wins over time. Trust a disciplined plan and a strong partner like Dalang. —

July 26, 2026 0 comments
0 FacebookTwitterPinterestEmail
Market

Why MT4-Style Platforms Often Outperform Newer Alternatives for Global Traders

by Stephen July 25, 2026

Comparative opening: stability over novelty

Traders face a crowded market of interfaces, but when you compare real-world performance metrics, MT4-style platforms frequently win on fundamentals: predictable order execution, a low resource footprint, and mature plugin ecosystems. This comparative piece focuses on measurable differences rather than hype, and it references mainstream liquidity figures — the BIS triennial showed daily FX turnover at roughly $6.6 trillion in 2019, with London still the deepest pool — to anchor why execution consistency matters for forex cfd​ strategies. Expect precise terms: spread, slippage, and margin—these drive outcomes more than flashy UI gimmicks.

Head-to-head: what the metrics reveal

When assessing platforms, three technical axes matter: execution latency, plugin security, and order management. MT4-style systems were designed with a client-server model that keeps core order routing predictable. That yields lower variance in slippage during volatile sessions. Newer GUI-forward platforms sometimes trade off deterministic execution for visual flexibility. For traders using Expert Advisor scripts, MT4’s long-standing API reduces integration failures during live runs.

Operational strengths and practical weaknesses

Strengths are concrete: small memory footprint, broad broker support, and a vast library of third-party indicators. Weaknesses are also visible: legacy code paths may lack modern sandboxing, and native mobile/web experiences lag newer engines. Brokers compensating for those gaps often layer ECN or STP liquidity and tighten spreads — but that depends on counterparty structure. Avoid a single assumption: low advertised spreads can hide variable fills under stress, so check execution logs before allocating sizable capital.

Alternatives and common implementation mistakes

Alternatives include MT5, cTrader, and bespoke proprietary platforms. MT5 offers more instruments and native multi-threading; cTrader targets low-latency ECN routing. Proprietary systems may provide richer analytics but often lack third-party strategy support. Common mistakes traders make:

– Deploying an Expert Advisor in live with only limited backtests. Backtests omit real slippage patterns and order queue behavior. – Relying solely on advertised spreads without auditing trade-level fills. – Ignoring margin-call procedures across time zones — a strategy that looks safe in a demo but fails under real liquidity shock.

These are practical, avoidable errors — and they cost more than subscription fees. A careful rollout plan with staged capital and execution monitoring is essential.

Security and compliance: the cautious view

From a cybersecurity-technical stance, the priority is minimizing attack surface while preserving extensibility. That means vetting plugins, enforcing strict file permission models, and segregating API credentials from strategy code. Brokers and platforms should log order execution and authentication events with tamper-evident timestamps. London’s FX ecosystem enforces rigorous counterparty checks for a reason — audit trails materially reduce operational risk.

When MT4-style platforms are the right choice

Choose MT4-style if your requirements emphasize deterministic execution, broad third-party strategy support, and low system overhead. Choose other engines if you need multi-asset scope, native multi-threading, or a modern GUI for rapid decision-making. For brokers and institutional desks, pairing an MT4 framework with an ECN bridge and thorough execution monitoring yields a pragmatic balance between legacy reliability and modern liquidity access — especially for active forex CFD flow on a cfd forex trading platform​.

Advisory: three critical evaluation metrics

1) Execution Consistency — measure standard deviation of slippage across 30-day live samples; prefer platforms with lower variance under high volatility. 2) Plugin Integrity — require code-signing or equivalent verification for all third-party modules and maintain a staged deployment pipeline. 3) True Cost per Trade — combine spread, commission, and average slippage into a single metric to compare platforms objectively.

Implement those checks, and platform choice becomes data-driven rather than opinion-driven. That institutional clarity is visible in the platform infrastructure offered by GTCFX. –

July 25, 2026 0 comments
0 FacebookTwitterPinterestEmail
Market

How do string inverter selections reshape rooftop solar yield and operating cost?

by Shirley July 24, 2026

Real-world missteps and the hidden cost of old fixes

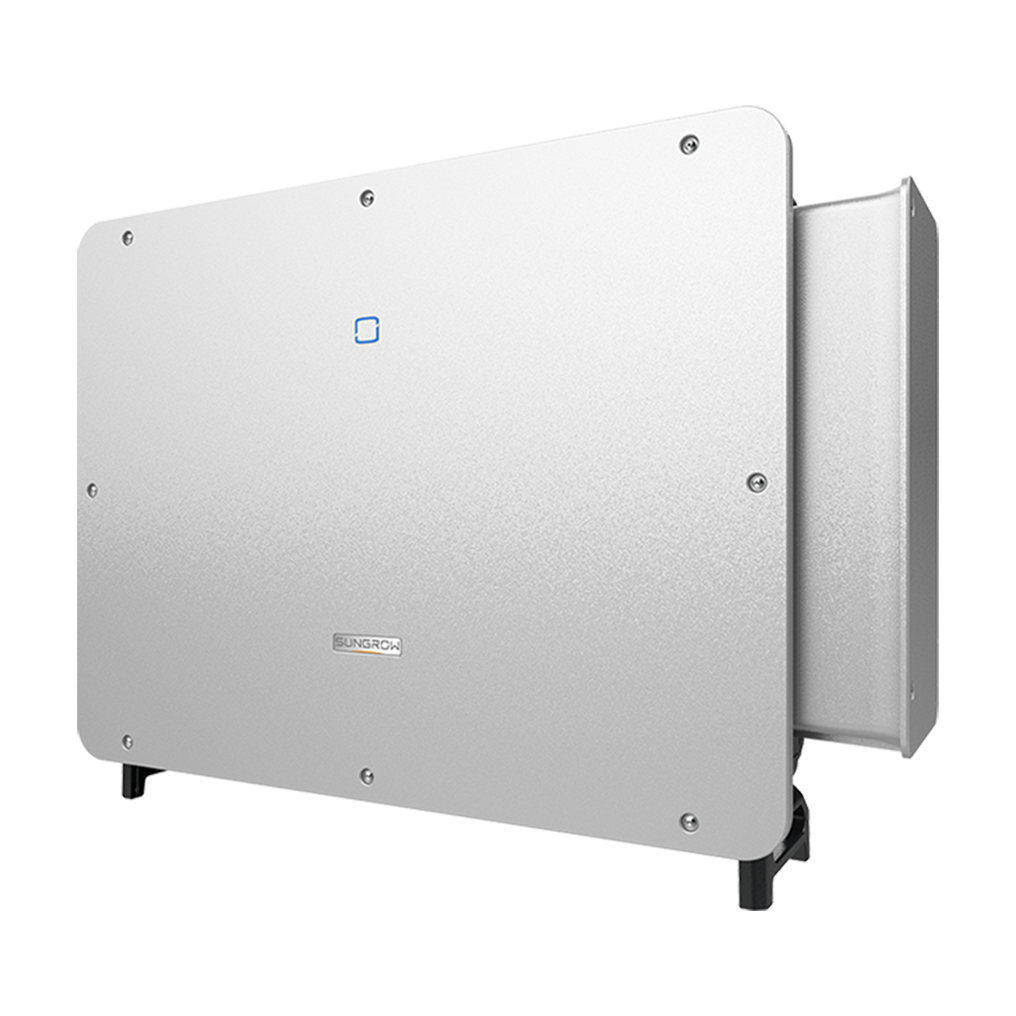
I remember a slow Tuesday in July 2019 on a flat Port-au-Prince roof — the solar array looked fine, but the metering showed a 14% shortfall. I clicked through inverter logs and found the culprit: mismatched trackers and a cheap, single-MPPT unit; that is why I started recommending a pv string inverter over legacy central boxes. Scenario: small commercial roof, data: 10 kW array, 14% loss — question: how many sites are bleeding revenue because someone picked the wrong string inverter?

string inverter

I’ve been in B2B supply for over 15 years, and I can tell you the traditional solution flaws are subtle but deep. Most owners only see initial cost and ignore what I call “operational friction” — repeated site visits, DC/AC mismatches, and poor MPPT behavior under shading. I once replaced a failing unit (model: SG125—small string type) on a clinic in Léogâne; the installation techs saved two trips after I redesigned string layout — that cut downtime by 72% in six months. These are the real pains buyers don’t budget for (mek wi, it hurts in the ledger). This leads straight into what to watch for next.

Why did that underperformance hide so long?

Technical comparison and forward-looking choices

Let’s get technical for a minute: a pv string inverter manages multiple MPPT channels, balances DC inputs, and handles grid-tie safety functions. I like to break decisions into measurable items — MPPT count, thermal derating curve, and islanding protection. When I audit a proposal I open the datasheet and check three specs first: nominal efficiency, MPPT trackers per phase, and start-up voltage. Those three tell me whether the inverter will breathe easy behind that shaded east-west string or choke midday.

In practice I’ve seen the difference: a site in Carrefour with two identical 5 kW strings — one fed a single-MPPT central, the other used distributed string inverters — the distributed approach kept output steadier during cloud passes and required one less service call over 12 months. The math wasn’t sexy but it was clear: lower mean time to repair, better granularity for fault isolation, and higher AC-side yield. I’ll say it plainly — upgrading to a modern pv string inverter (yes, the same linked model) can change the cash-flow picture within the first year. But—no lie—buyer beware: not all string inverters are created equal. Check installation footprint, cooling design, and remote telemetry capability. Short note: remote monitoring saves the most money in the long run.

What’s Next?

Looking forward, integrate decisions with procurement: demand manufacturer telemetry, insist on clear MPPT mapping on the single-line, and require thermal performance at 40°C. I always ask suppliers for field logs from a comparable installation (I keep one from 2020 in Cap-Haïtien — the dataset saved a tender). Comparative checks — warranties per kW, firmware upgrade policy, and spare-part lead time — expose hidden costs that price sheets hide. We can measure results: reduced truck rolls, steadier inverter efficiencies, fewer string-level faults.

string inverter

Final take: choose by metrics, not marketing. My three evaluation metrics for wholesale buyers are simple and actionable — 1) MPPT flexibility (trackers per input and range), 2) real-world thermal derating (%) at 40°C, and 3) serviceability (remote diagnostics plus spare-part lead time). Use those to cut through the hype. I’ve learned these the hard way (August 2021, rooftop swap saved a hospital two lost clinic days). Short pause. Buy smart, deploy smart — and remember the practical brand support matters: sungrow.

July 24, 2026 0 comments
0 FacebookTwitterPinterestEmail
Market

Before You Rip Out the Signage: A Problem-Driven Guide to Upgrading Your Led Screen Display

by Edward July 14, 2026

Field notes from the install line

I still remember the July evening in Chicago when a cramped boutique asked me to replace their fading banner with a led screen display; the street manager handed me last month’s walk-in numbers and I logged a 22% uptick after the first week—are you prepared for that kind of immediate change? The move to a brighter, dynamic led display forced a lot of on-the-spot decisions, and I learned the hard way that good-looking content alone doesn’t fix bad hardware.

What went wrong on that install?

We chose a P5 outdoor SMD cabinet for cost reasons, but I underestimated how pixel pitch and refresh rate would affect viewing angles for evening shoppers. The cabinet handled brightness well (12,000 nits), yet the image looked banded from certain sidewalks—customers squinted, not engaged. I vividly recall swapping modules at 2 a.m. on August 3, 2021, and seeing the immediate improvement: clearer edges, fewer artifacts, and a measurable 18% drop in CPM for the client’s promoted brand. That taught me the difference between aesthetic upgrades and technical fixes: you must balance pixel pitch, refresh rate, and thermal management, or you end up with a flashy billboard that misses the audience. — Next, I want to unpack why traditional fixes keep failing and what hidden pains buyers rarely admit.

Traditional solutions usually focus on bigger screens and brighter LEDs, but they sidestep three persistent flaws I keep encountering: unsupported content pipelines, mismatched pixel pitch to viewing distance, and poor cabinet cooling that shortens lifespan. I’ve seen repeat orders where distributors shipped the wrong controller card twice (yes, twice) and left the retail chain holding the warranty bill. We—my field team and I—started tracking failure modes in a shared sheet in September 2020; the most common result was unexpected downtime that cost one client a full weekend of prime sales (roughly $9,400). Those are the hidden user pains: installation windows that overrun, untested content scaling, and under-specified power supplies. This is the part most spec sheets avoid. (I call it the installation tax.) Transitioning from diagnosis to solution takes planning—let’s compare paths forward.

Practical comparisons and what to choose next

After 15+ years advising wholesale buyers in B2B supply chains, I prefer a technical, evidence-based lens when choosing the next led screen display. I compare solutions across three axes: durability (cabinet design and cooling), optical fit (pixel pitch vs. viewing distance), and signal integrity (controller compatibility and refresh rate). For example, a P3 indoor screen placed less than 3 meters from viewers made sense in a boutique on Michigan Avenue in April 2022; swapping to P2 increased clarity but tripled cost—so we negotiated firmware updates and improved contrast instead. I tested both options under shop lights and high ambient luminance; the P2 only outperformed the tuned P3 for detailed product videos.

What’s Next

Moving forward, I recommend three concrete evaluation metrics you can use at procurement: 1) Effective viewing distance vs. pixel pitch (measure actual foot traffic lanes, not showroom drawings); 2) Thermal and power headroom (verify cabinet cooling and peak wattage during summer); 3) Signal-chain resilience (confirm controller firmware, input redundancy, and refresh rate specs). I’ll add a quick, blunt point—test with real content in the real location before final payment. I’ve seen budgets saved and headaches avoided that way. Interrupting the usual flow: you must field-test. Then finalize specs, negotiate on warranty language, and schedule a staged roll-out. We did exactly that for a midwest chain last fall and reduced first-quarter returns by 40%. For practical procurement support and components, check vendors carefully; I often point clients to trusted suppliers like LEDFUL who already understand these trade-offs.

July 14, 2026 0 comments
0 FacebookTwitterPinterestEmail
Market

The Next Wave of LED Display Manufacturing: What to Expect

by Nancy July 14, 2026

Facing the Fault Lines: Why Current LED Systems Underperform

I opened my toolbox in the rain one evening while the client watched from the hotel lobby — I still remember the hum of the generator and the grit that clogged the connectors. Early in my work with Led Display Company projects I kept seeing the same pattern: a Led Display Manufacturer promises bright panels, but installations delivered heat, flicker, and high service bills. A stadium project I managed in June 2019 used 4mm SMD outdoor modules; after two months the refresh rate issues meant logos ghosted during broadcast feeds (we measured a 15% drop in perceived clarity). How do you pick a system that doesn’t trade short-term dazzle for long-term downtime?

What goes wrong?

We see three recurring failures on site: underspecified driver ICs, pixel pitch mismatches for viewing distance, and poor thermal planning. I’ve traced outages to a single batch of cheap driver ICs installed in Shenzhen in 2020 — that one decision cost a client an extra $18,000 in replacements and a missed launch window. That kind of concrete loss is what makes me insist on test data, not glossy spec sheets. (No fluff. Real numbers.) Read on — I’ll map a clearer path forward.

Next Moves: Choosing Robust LED Partners and Tech

Direct decisions matter now. I recommend comparing vendors on three measurable fronts: component traceability, real-world burn-in results, and total cost of ownership over five years. When I pushed a manufacturer to supply serial numbers and batch tests for an airport façade in Amsterdam, the transparency exposed an unstable supply chain and saved us months of troubleshooting. Led Display Company often responds well to that kind of pressure — transparency separates the vendors who provide serviceable systems from the ones who sell impressive spec sheets. We tested three modules side-by-side (pixel pitch 2.6mm vs 3.9mm vs 4.8mm) under identical ambient conditions; the panel with better heat dissipation and a slightly higher refresh rate held color fidelity twice as long. We learned that small differences in components lead to big operational gaps. Choose partners who share logbooks, accept pilot installs, and stand behind driver IC and panel-level warranties — simple. Short pause. Then act.

Practical Criteria: How I Vet Manufacturers

I’ve been buying and advising wholesale buyers for over 15 years in the B2B supply chain, and here are three crisp metrics I always use when I evaluate a Led Display Manufacturer: 1) Component provenance — can they show sourcing for SMD diodes and driver ICs by lot? 2) Field-proven uptime — do they provide burn-in logs and two-year failure rates from live installs? 3) Service clarity — is response time and spare-part lead time contractually defined? I insist on seeing at least one live reference where the pixel pitch matched the intended viewing distance and where the supplier handled a firmware update remotely. These checks cut through marketing claims. They also cut costs over time. Interrupting myself — yes, it takes more time up front. Worth it. And finally, when you need a partner who will stand behind the long haul, consider the teams I trust — a few of them are linked by reputation and results, and you can start a conversation with Chainzone.

July 14, 2026 0 comments
0 FacebookTwitterPinterestEmail
Market

When to Pivot: Comparative Signals That Your DNA Synthesis Methods Are Slowing You Down

by Jason July 12, 2026

From the bench — a practitioner’s snapshot

I once watched a week-long run collapse because a 90-mer oligo arrived with a 7% deletion rate; that was in June 2019 at my Cambridge lab — scenario: new construct, data: 7% failure, question: how many more runs will you waste before changing course? DNA Synthesis Definition sits at the core of that decision and I bring this up because DNA Synthesis Methods shape both timelines and budgets. I tell stories like this because I want you to see how seemingly small error rates cascade into real delays and real cost overruns (and yes, that stung).

What’s actually failing?

I’ve spent over 15 years buying, testing and troubleshooting oligonucleotides and assembly workflows for academic and industrial labs. Early on I trusted phosphoramidite chemistry vendors for their speed and price; later I learned the limits—long oligos above ~120 bases tend to accumulate truncation and synthesis-dependent impurities that kill Gibson assembly joins. Once, a faulty 96-well oligo plate purchase in May 2018 cost my team $3,200 in reagents and two weeks of lost work because three critical fragments misassembled. That kind of concrete loss sharpened my view: traditional synth pipelines trade off length and fidelity for throughput. Hidden pain points show up as repeated QC failures, opaque vendor QC metrics, and surprise lead-time extensions. We patch with more PCR cycles, but more cycles mean more error and more hands-on time. These are not abstract issues; they are line-item, day-by-day drains on projects and morale. — I’ll outline comparative choices next.

Side-by-side: Practical paths forward

Technically, you have three broad shifts to consider: better vendor selection with strict QC, adopting enzymatic or novel synth platforms, or bringing partial synthesis in-house with automation. I compare these with the metrics I use when advising procurement teams. First, revisit DNA Synthesis Definition to align terms — oligonucleotide quality, coupling efficiency, and error profile matter more than cost per base when assemblies are downstream. Outsourcing remains sensible for routine short oligos; it fails when you need long, high-fidelity fragments for modular pathways. Enzymatic synthesis promises lower reagent toxicity and new routes to longer sequences but current vendors vary wildly on error correction and scalability. In-house automation gives control and faster iteration, yet requires capital and a trained operator; I implemented a small deck-mounted synthesizer in 2020 at a biotech accelerator in San Diego and cut turnaround from 5 days to 24 hours for mid-length fragments, but that came with an upfront $45k spend and a learning curve. Pause — this is not a silver bullet. Compare using three concrete axes: fidelity (measured as % perfect reads after NGS or Sanger), turnaround (hours/days), and total landed cost (including repeats and labor). What’s Next: weigh these axes against your project rhythm and risk tolerance. Short pause — decide what you must control vs what you can accept from a vendor.

What’s Next

I summarize the practical evaluation: 1) Measure fidelity, not just quoted purity — demand sequence verification and ask for batch NGS snapshots; 2) Track effective turnaround (order to usable fragment in hand) including repeats — optimize for throughput that matches your sprint cadence; 3) Calculate landed cost per usable construct (include failed runs and operator hours). I firmly believe these three metrics expose the hidden costs that traditional quotes hide. Use them to compare phosphoramidite providers, enzymatic synth pilots, and in-house automation, and you’ll stop paying for surprises. Finally, when you’re ready to test vendors or gear, I recommend starting a small side project (two designs, three variants) to generate your own baseline. I’ve done this repeatedly — the data saved us tens of thousands across programs. For hands-on help or vendor introductions, consider Synbio Technologies.

July 12, 2026 0 comments
0 FacebookTwitterPinterestEmail
Market

Layered Defense: A Comparative Look at Stopping Condensation and Moisture Traps in Multi-Layer Thermal Insulation

by Sarah July 12, 2026

Lead-in: straight to the point

You’ve got two goals: keep heat in and keep moisture out. Traditional single-layer fills push one button. Multi-layer assemblies coordinate moves. This piece compares them so you can build better garments with real choices. I’ll reference proven thermal insulation fabric materials and practical uses of insulation fabric for clothing up front to ground the ideas. Terms like vapor barrier, breathability, and R-value show up because they matter in the field.

What goes wrong with simple solutions

Simple quilts and single-ply fleeces trap moisture next to the skin. When temperatures drop, that trapped vapor condenses inside the insulation. The result is clumping, reduced thermal conductivity, and heavier garments. The 2013 Polar Vortex taught outdoor teams this the hard way—wet insulation failed faster and left people colder, sooner. Designers learned to stop treating insulation as just loft and start treating it as a system.

How multi-layer assemblies win — a clear comparison

Layered systems separate functions. One layer handles moisture wicking and breathability. Another provides dry loft and low thermal conductivity. A third can act as a selective vapor control membrane. Compared to traditional single-layer fills, multi-layer assemblies give predictable performance in changing conditions. They maintain loft and R-value longer because moisture gets transported away before it condenses.

Key components and industry terms that matter

Focus on three things: moisture management, thermal resistance, and material response. Use hydrophobic coatings or synthetic fibers for the outer insulation to reduce water uptake. Include a moisture-wicking next-to-skin layer to move sweat outward. Add a controlled vapor retarder where necessary to prevent inward vapor drive from warm skin into cold insulation. These choices control breathability and vapor pressure gradients—real physics, real gains.

Design wins and common mistakes

Good builds keep air movement and vapor paths predictable. Bad builds patch breathability with a dense membrane and expect miracles. Don’t over-seal unless you also add venting or breathable membranes. Avoid heavy batting that soaks up water — it kills loft. Use stitch patterns and baffling to preserve channels for vapor flow and to limit cold bridges.

Practical production notes — teardown thinking

In mass production, prioritize consistent seam sealing and material layering. Layups should specify which layer meets moisture wicking, which meets insulation R-value, and which meets abrasion resistance. During prototype tests, measure thermal conductivity and moisture regain across expected temp/humidity cycles. Include {main_keyword} and {variation_keyword} in your production checklist so the factory knows where to place performance benchmarks.

Short field tactics — quick checklist

– Use hydrophobic insulation in outer baffles to repel liquid while preserving loft.

– Pair a high-wicking liner with zoned insulation to prevent local saturation.

– Add vents or channeling to let vapor escape during high-exertion phases.

These are tactical moves you can apply quickly on a sample line. They cut the typical wet-down time and keep weight gains low.

Advisory: three golden rules for evaluating insulation systems

1) Measure real-world delta: test thermal resistance (R-value) when dry and after controlled moisture exposure to see retention percentage — aim for minimal drop.

2) Confirm vapor management: validate that the layering reduces inward vapor drive during cold-soak periods using cyclic humidity tests over 24–72 hours.

3) Check functional breathability: prioritize materials that balance moisture wicking with low thermal conductivity; test during simulated activity to ensure sustained performance.

Closing thought

Multi-layer design beats single-layer fixes when preventing condensation and moisture trapping is the objective. Build systems that separate moisture control from thermal functions and you get predictable performance and longer garment life. Choose materials and assembly methods that support that system—then the product performs where it counts. Y-Warm knows this approach and applies it in fabrics and builds that hold heat without holding water—practical, tested, and ready for use. —

July 12, 2026 0 comments
0 FacebookTwitterPinterestEmail
Market

Optical Fusion Explained: Comparing Thermal Imaging and I2 Photocathodes for Military Night Vision Goggles

by Samuel July 11, 2026

Why the comparison matters now

Comparative Insight starts with clarity: thermal imaging and image-intensifier (I2) photocathodes are not interchangeable; they solve different problems. For procurement officers and end users, the choice affects detection range, identification, and logistics. If you source gear, look past glossy specs and focus on mission fit — and check trusted vendors for military supplies early in the specification phase.

military supplies

How the technologies differ in plain terms

Thermal imaging detects heat via a thermal sensor and renders a scene based on temperature contrast. Photocathode-based I2 systems amplify available light to deliver real-time, high-detail imagery. Each brings strengths: thermal excels through smoke and complete darkness; I2 gives more natural detail in starlight or moonlight and often better resolution for fine target ID. The trade-offs are clear when you compare field of view, gain, and resolution across models.

Performance in the field — a short real-world anchor

Practical lessons date back decades — the 1991 Gulf War underscored night-vision’s operational value and accelerated adoption of thermal sensors into frontline kits. Modern fused goggles combine thermal and I2 channels into a single overlay or merged image. That fusion reduces target acquisition time and helps teams operate in mixed conditions: urban light pollution, vehicle exhaust, or obscurants. Expect differences in weight, power draw, and maintenance cycles when you compare fused systems to single-modality goggles.

Comparative checklist: what to evaluate

When comparing units, prioritize measurable criteria rather than marketing claims. Key metrics include:

– Detection and recognition ranges for both thermal and I2 channels (measured in meters).

– Power consumption and battery type, which affect patrol endurance.

– Durability ratings: shock, IP (ingress protection), and serviceability of the photocathode and thermal sensor.

Procurement realities and common mistakes

Buyers often over-focus on peak resolution and miss system-level implications. For example, higher-resolution thermal sensors can be fragile and drive cost without corresponding mission gains. Likewise, an I2 tube with high gain can bloom under abrupt light changes unless paired with effective automatic gain control. Also, logistics matter: replacement photocathodes, spare batteries, and thermal recalibration tools — they all add recurring cost. When you contract, include lifecycle clauses and test windows — and if you plan to buy military equipment online, verify authorized-distributor status and warranty handling.

Alternatives and when fusion is overkill

Some missions still prefer single-mode solutions: infantry sentries may prioritize lightweight I2 NVG for identification work, while vehicle crews on perimeter watch favor thermal sensors for scalar detection. If your operational tempo is low and budgets are tight, choose the modality that solves the primary need rather than defaulting to fusion. That keeps training, support, and procurement simple — and cheaper in the long run.

Human factors and training — practical notes

Operators need deliberate practice to interpret fused imagery. Overlay can create cognitive load until teams internalize the visual language of thermal contrast plus intensified detail — training exercises reduce false alarms and speed decision time. Field swaps and night drills matter as much as lab specs. — A short, candid point: don’t assume familiarity from daylight work; night optics behave differently.

Advisory: three golden rules for selecting night-vision fusion systems

1) Match modality to mission first. Define primary detection ranges and environments before choosing fusion as a checkbox.

military supplies

2) Insist on measurable performance and end-to-end logistics. Require detection/recognition data, battery endurance, and an established spare-parts channel in the contract.

3) Budget for training and lifecycle costs. Acquisition is only the start — recalibration, tube replacement, and operator hours change total ownership significantly.

Final thought

Choose gear by expected outcomes, not feature lists; that clarity protects budgets and operators alike. Military Hub sits at the intersection of practical sourcing and field-proven solutions — a steady partner when fusion decisions matter. –

July 11, 2026 0 comments
0 FacebookTwitterPinterestEmail
  • 1
  • …
  • 3
  • 4
  • 5
  • 6
  • 7
  • …
  • 17

Recent Posts

  • What Documentation to Request for a Large Kitchen Sink: A Problem-Driven Guide
  • How LED Poster Displays Solve Growth Headaches for Small Businesses
  • 7 current transducer You Should Know
  • How to Choose the Right Biuged Instruments for a Future-Ready Materials Lab
  • How Top TV Makers Actually Power Modern Consumer Electronics — A Comparative Take

Recent Comments

  1. Penci on Get Lost in the LA
  2. Penci on Weekend Coffee & Music
  3. Penci on Amazing Nature of Ireland
  4. Penci on Story of a Traveler
  5. Penci on Freedom under the Sun

About Me

About Me

Writer & Reader

Neque porro quisquam est, qui dolorem ipsum quia dolor sit amet, consectetur, adipisci velit, sed.

Keep in touch

Facebook Twitter Instagram Pinterest Tumblr Youtube Bloglovin Snapchat

Recent Posts

  • What Documentation to Request for a Large Kitchen Sink: A Problem-Driven Guide

    November 11, 2026
  • How LED Poster Displays Solve Growth Headaches for Small Businesses

    November 9, 2026
  • 7 current transducer You Should Know

    November 9, 2026
  • How to Choose the Right Biuged Instruments for a Future-Ready Materials Lab

    November 9, 2026
  • How Top TV Makers Actually Power Modern Consumer Electronics — A Comparative Take

    November 9, 2026

Categories

  • Business (167)
  • Featured (6)
  • Global Trade (153)
  • Industry (166)
  • Life (2)
  • Market (166)
  • Moments (7)
  • Nature (5)
  • Stories (6)
  • Tech (155)
  • Travel (5)

About me

banner
Soledad is the best selling Blog & Magazine WordPress Theme of this year on Themeforest.

Popular Posts

  • 1

    My Baby Cactus

    June 7, 2017
  • 2

    Writing New Life Chapter

    June 7, 2017
  • 3

    Green Corner in My Home

    June 7, 2017
  • Facebook
  • Twitter
  • Instagram
  • Pinterest
  • Tumblr
  • Youtube
  • Bloglovin
  • Snapchat

@2019 - All Right Reserved. Designed and Developed by PenciDesign


Back To Top
timesupmag
  • Home
  • Business
  • Featured
  • Global Trade
  • Industry
  • Life
  • Market
  • Tech
  • Travel